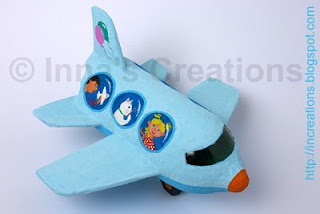
Hurray! Finally we've finished this papier-mache aircraft made of a plastic bottle after Tatyana Dubinsky's "Goldfish" (in Russian). The process was taken pictures of for those who're interested.
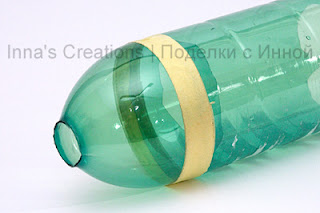
Step 1: Remove the middle part of the bottle to make it shorter and cut off all those juts at the bottom, except one. Cut off the bottleneck. All this for the fuselage to look nice and smooth. One jut on the bottom should be left to support the tail.

Step 2: Join the two parts of the bottle using a masking tape.
Step 3: Cut out the wings and parts of the tail from thick cardboard, and attached them to the fuselage with the masking tape.

Step 4: Build the landing gear by stacking plastic bottle caps and fixing them with the masking tape: two caps for the front and six for the main unit.


Step 5: Plug the bottleneck with a foamed plastic ball, but a crumpled paper ball will also do.
Step 6: Cover everything with three or four layers of papier-mache, that is small pieces of paper dipped into white craft glue mixed with some water. We often use copy paper scrap. Although this sort of paper isn't the best choice for papier-mache, it allows getting thick layers quickly — for impatient little craft makers :) When coating the bottle, leave a strip of uncovered plastic in front of the aircraft, that would be the cockpit. The pilot should be able to see the way!

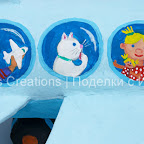
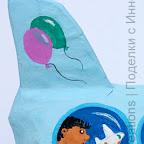
Step 7: Decorate, of course. You may want to glue pictures of your family members into the windows. Be creative as much as you can at this stage.
More pictures for inspiration (click to enlarge):



30 comments:
awesomeness!!!! it's totally sick!
it helped a lot with my project... thx.
Thank you, pleased to hear it helped you. What kind of project? Why won't you share the results?
we tried really hard to make it as kewl as yours, but it didn't, unfortunately. Your post really helped though. Thanks so much for posting, it looks awesome....:D
~KSA
Thank you :)
Sorry to hear it didn't work out :( But what did go wrong? Can I help?
My nephew tried to made one with his mother and I must say they had it very cute :)
this is such a good idea , xD
im going to do this for my project ! hope mine looks as good as yours goes !! , xD WISH ME LUCK !!
i love this plane!
Thank everyone very much! I'm pleased to know that you like it :)
Hi loved the idea but had a question how much time does it take for the paper layer to dry
Nahal, sorry for the late response. You may build two-three layers at a time. Drying time depends on the drying conditions: weather, temperature, etc. Just wait until completely dry.
this is very helpful! hope we can make ours as cute as yours. :D thank you very much for posting! :D
You're welcome :)
This is Awesome! I'm gonna make this with my dad Thanks :)
You're welcome. Hope you'll have fun ;)
I'm so glad I found your blog! My 1st grader wants to make an airplane for his transportation project for school and I think this will be perfect! Thanks!
this is awsome i am going to use this for my flight project u r soo smart
YAY! I have something cool to do with my parents :) This is awesome Thanks so much for posting this :)
You are welcome :)
Um is it ok if I don't cut out the juts?
The idea is very interesting, so I decided to do the same plane for my nephew. Finished work to look at my blog:)
hi innna ,can i ask wether u make a sourvenios??
@anonymous
I'm sorry, but I don't understand your question. It's probably misspelled. Did you mean "souvenirs"? Could you be more specific, please?
beautiful! i am ready to do it with my 4 years old girl, you think we can do the layers with news paper and then paint? or with regular white paper sheets?
Thank you for the beautiful post =D
@proud mom:)
Thank you! Yes, you can use news paper, but it will take you more time to build up the layers. I'm not sure a 4 years old has enough patience for this :) I'd recommend re-using office paper.
Thank you !!! =D
This is an awesome idea! :) can't wait to make one with my little one :) Thanks!
I love this plane and I will try making it with my 4 year old grand daughter for her transportation project. However, could you show how you made the wings an tail for the plane. Thanks.
I want my project like this :) but first what are the things that I need or I need to buy ? Please Help :).
http://imgur.com/rFTtZjY
Thanks for providing a "do-able" model plane idea for my grandson to adapt.
He made this for a school competition to celebrate our local airport's 50th birthday.
Not nearly as polished as yours and it probably won't win anything but he is well chuffed with his handiwork and that is what matters.
Just to say that my grandson's plane was selected by the school to go forward to the next round :)
Using this for Cub camp this year!!
Post a Comment