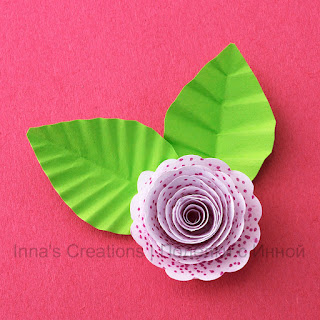
Recently I've been asked how to make the paper leaves with veins I sometimes use in my greeting cards. Let me show you my way of doing this in a step-by-step tutorial.
1. Cut out a paper leaf. I usually fold a sheet of colored paper in two and cut a symmetrical leaf shape around the fold.

2. Fold the leaf in two.

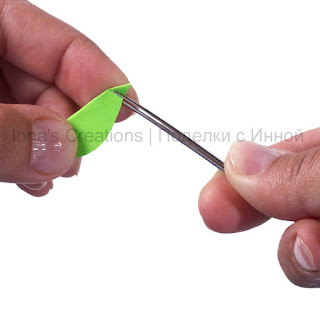
3. Grip it with narrow pointed tweezers, where you want a vein to be. Tip of the tweezers should be as close to the fold as possible.

4. Without releasing the grip of the tweezers, twist them clockwise or counterclockwise, whichever works best for you.

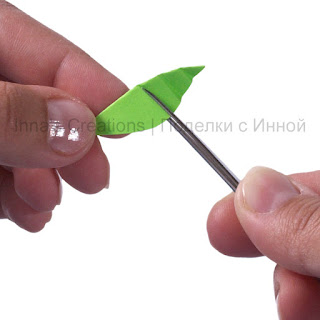
5. You've got a nice crease. Move the tweezers further on a little bit.

6. Twist again, without releasing the grip.

7. Repeat until you get all the creases you need: grip and twist.

You can make parallel veins that go at an angle to the center, or change the angle a little all the time so that the creases diverge like a fan.

Hold the leaf firmly, so that it's creased only where you want it to.

8. Make it to the other end of the leaf.

9. Now you can open the leaf and use it in a greeting card etc.

You've probably noticed that paper flower on the first photo. I explained how to make a simple paper rose for a greeting card earlier, and even produced a short video tutorial about it.
24 comments:
this is a great idea... This really highlights a simple leaf.
Thank you, Archana!
oh I forgot to mention.... The dotted flower looks too cute.. That paper is perfect for flowers isnt it?
Thanks, Archana. It's plain printer paper :) I just marked the dots with a gel pen.
Great technique Inna!
fantastic technique! I have a diferent one.
hi its nice
Colleen, Ana, rumma, thank you all! I'm glad you like this.
Ana, I like yours :) I also know a couple of other techniques, but like this one more.
hi i am a fan of urs.how r u?do u have a craft related business?thanks
Thanks, Rumma, it's just my hobby.
I ve become your big fan....
Дякую Інно, у вас найкращий сайт про квілінг!)
Спасибо за комплимент :)
Its really helpful.
Thanks
ashali, you're welcome! I'm glad you like it.
i am also intrested in it
im a fan of yours
Thanks :)
I am fond of Quilling, thanks a lot for your ideas:)
Украина!!!
Пожалуйста :)
inna thanks for this tutorial.
You are welcome, Angelin :)
Beautiful! Thanks!!! So helpful....
Thanks, Ninie!
Thank you very much - have been looking for a different leaf design for ages.
Post a Comment